uBlox NINA-W102 minimal breakout
While working on the badge design for MakeZurich 2018, I had the need to first make a breakout for the NINA-W102 we got from ublox to see what is possible, do some tryouts with different components like the display and start developing drivers and firmware we need for it. This is the outcome of it and as we did go on with the badge design, we switched from having a single-board badge to a modular badge where the modules can be reused standalone in a project. Hence on the final badge design you can reuse the display and the NINA-W102 module in your hacks and with a little bit of desoldering you can reuse the sensor module (which we got from Sensirion) as well.
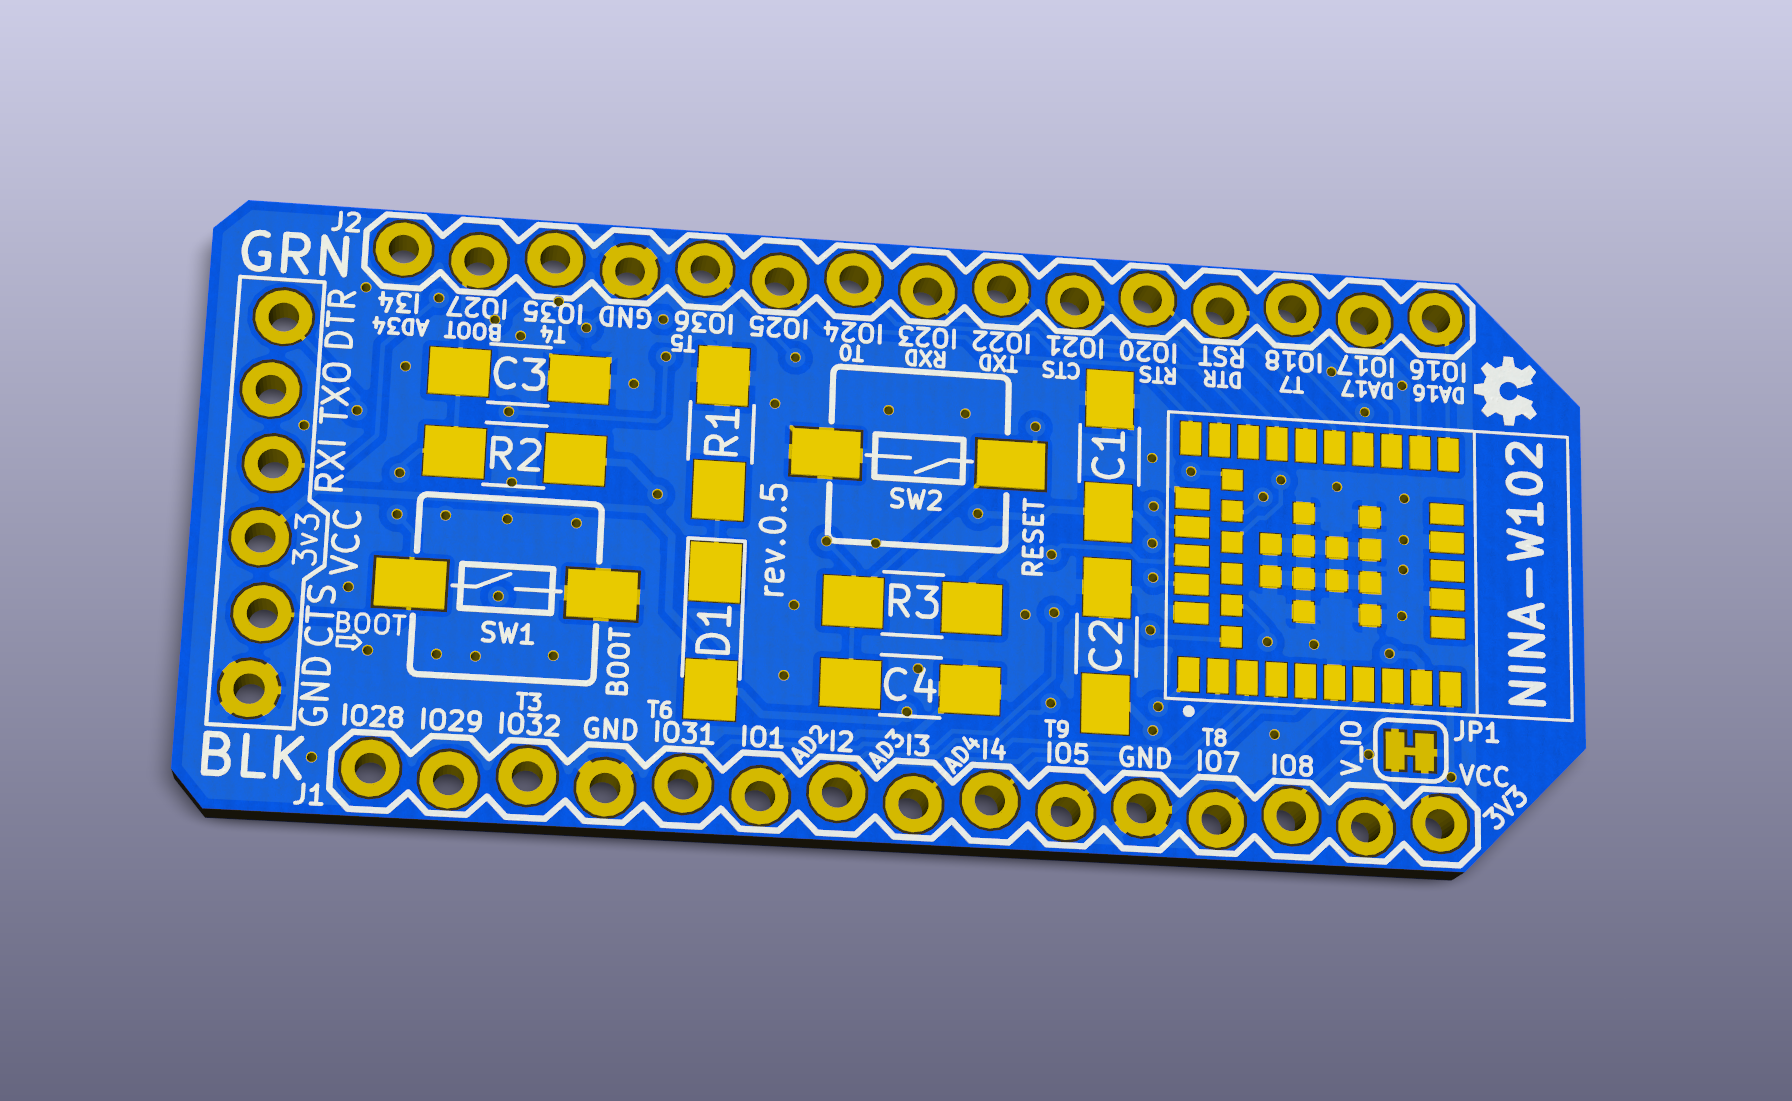
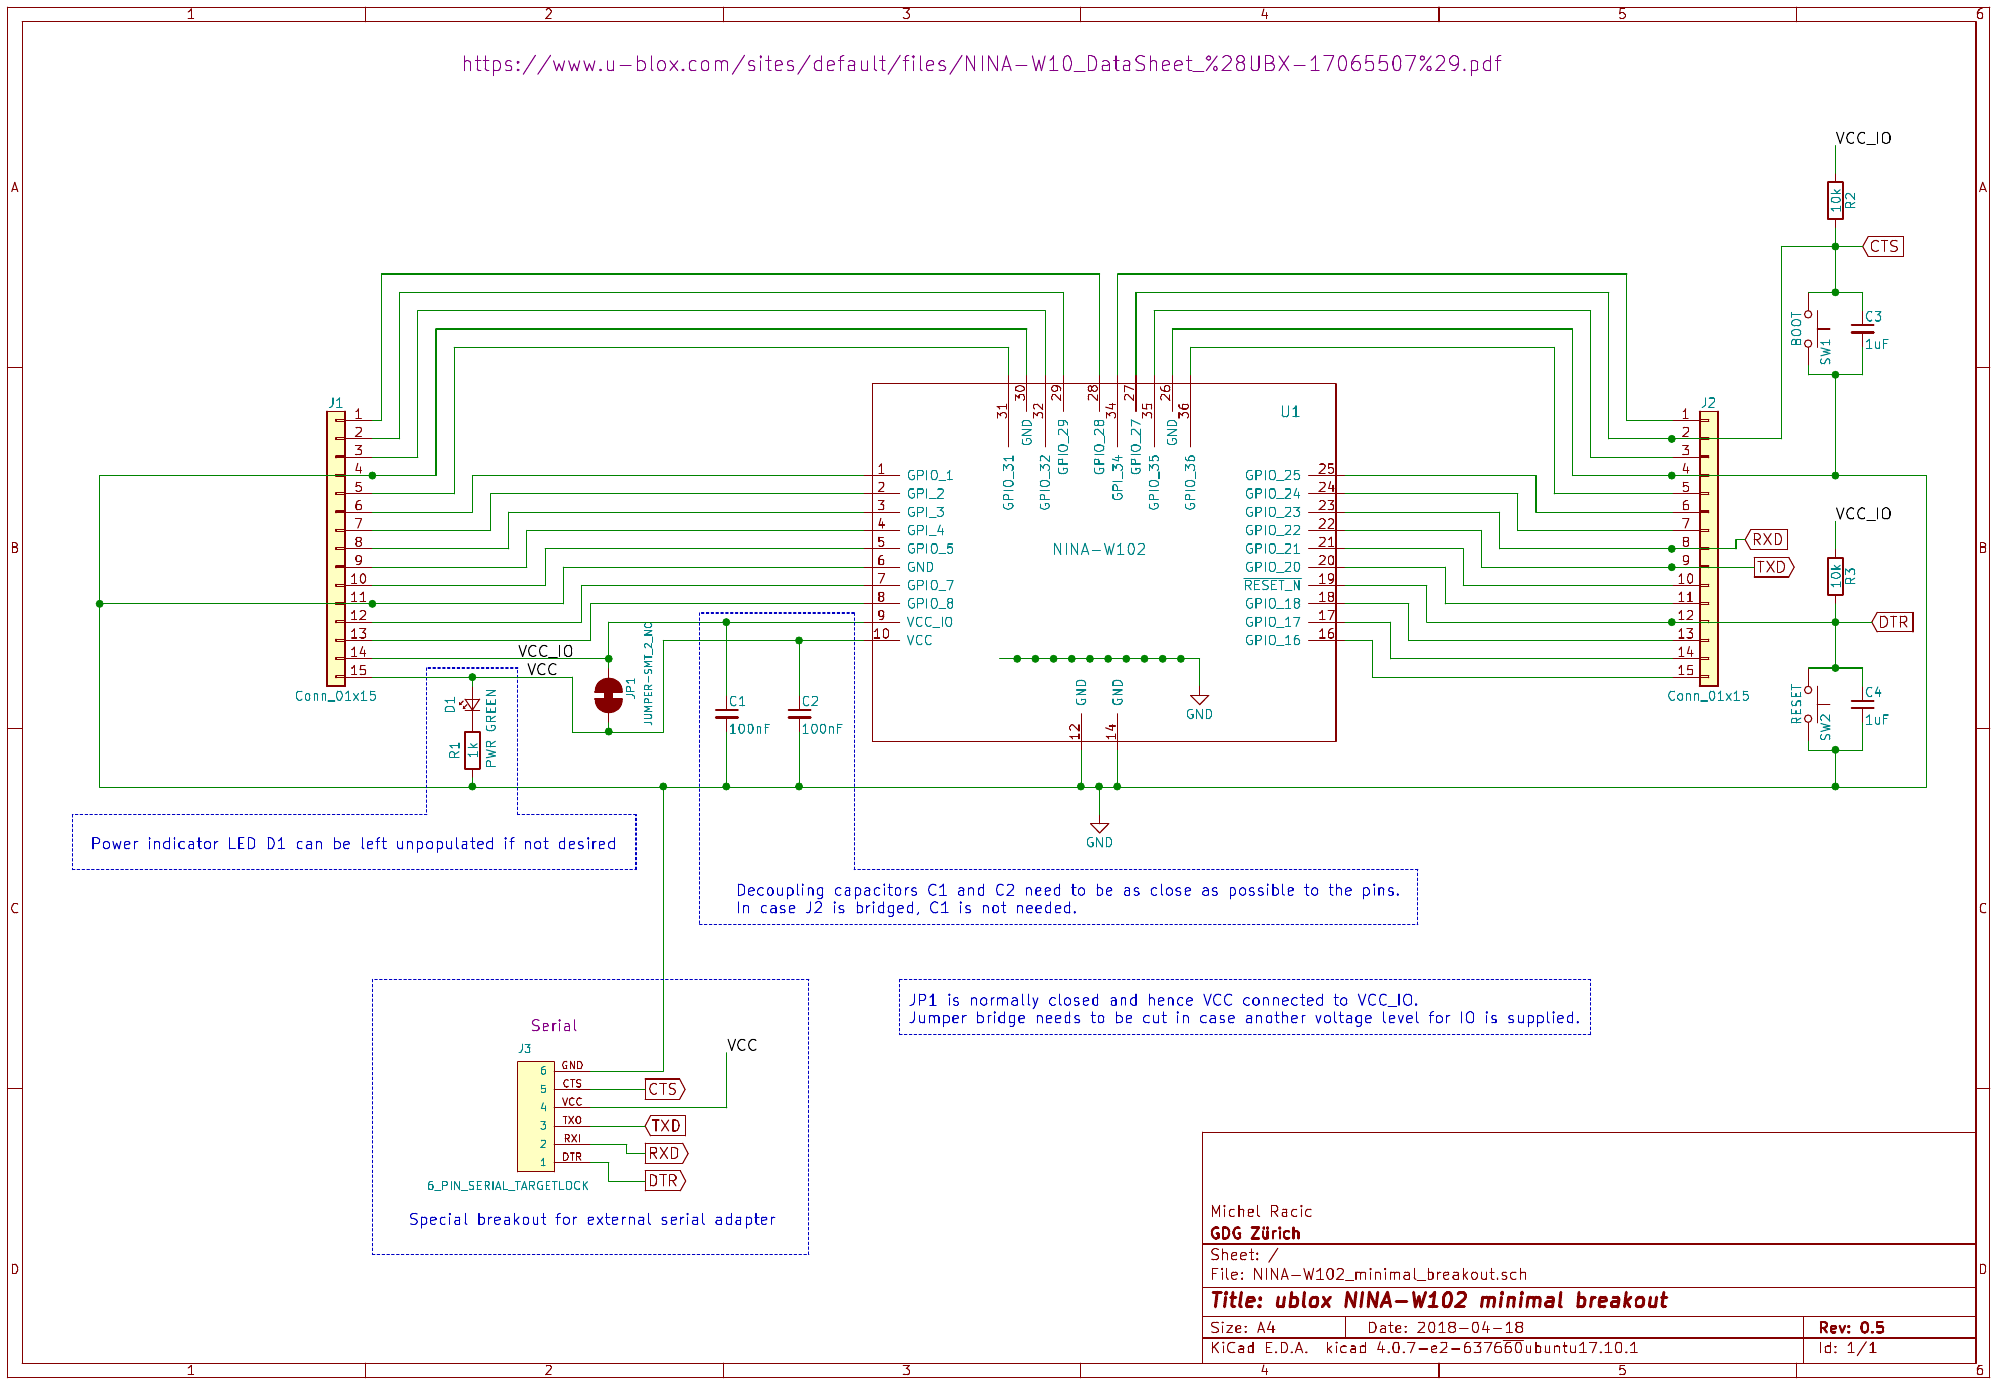
This is really a minimal developement board and it has no LDO on board which means you need to power it with 3v3 either trough the serial programmer header, Which is matching a standard FTDI adapter and can be used solderless, or VCC.
VCC_IO is by default bridged which means that IO Pins work with 3v3 as well but if needed the jumper can be cut and a different voltage supplied which will be used for the IO levels.
Its has a reset and a boot button, connected to the corresponding pins of the Nina which allow to programm it, the auto programmer circuit with crossing transistors has not been implemented after a hint from ublox that this gave some issues but I will try that in a future revision to see if I can get it somehow working.
The power LED is connected directly to VCC and can be safely left unpopulated or changed together with R1 and is only there as I wanted to have some indication if there is any powersource attached. The pcb layout is single sided and the components have size 1206 with extra long pads for easy handsoldering.
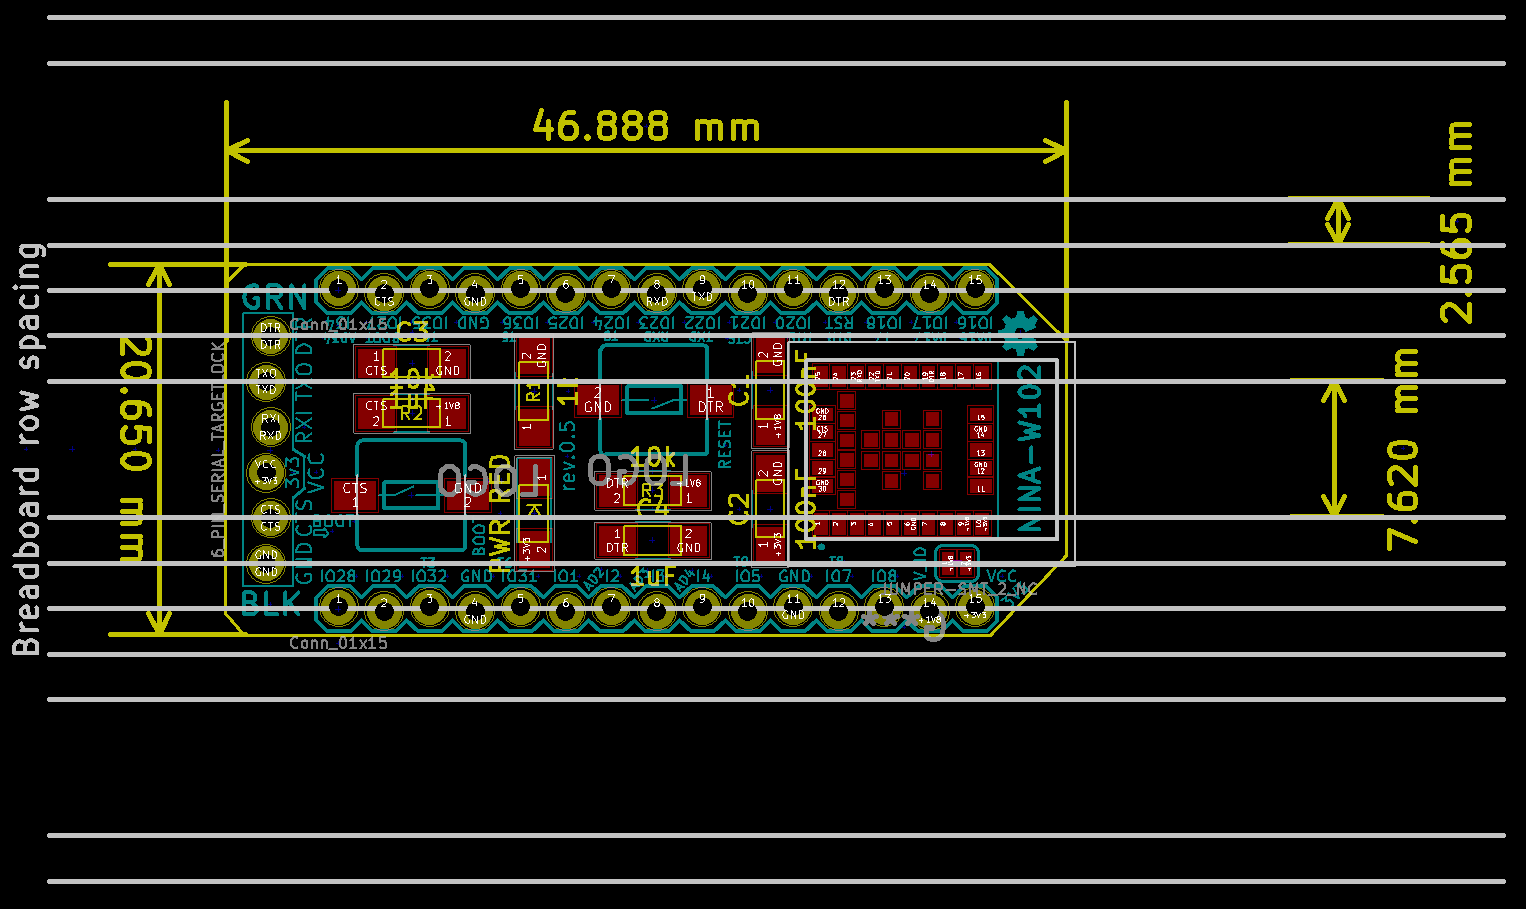
All headers have a shifted look, this was intended and is a tryout from an old sparkfun article. This allows for centering and holding the header for easy soldering without doing the breadboard trick and still get straight headers on it. In case of the FTDI header, this allows me to not have to solder any header on it but just plug the programmer in and out whenever I need to, in certain cases it can be that it is not enough contact and you have to slightly push it against the wall but in my trials it worked out good enough and is my favorite programming mode.
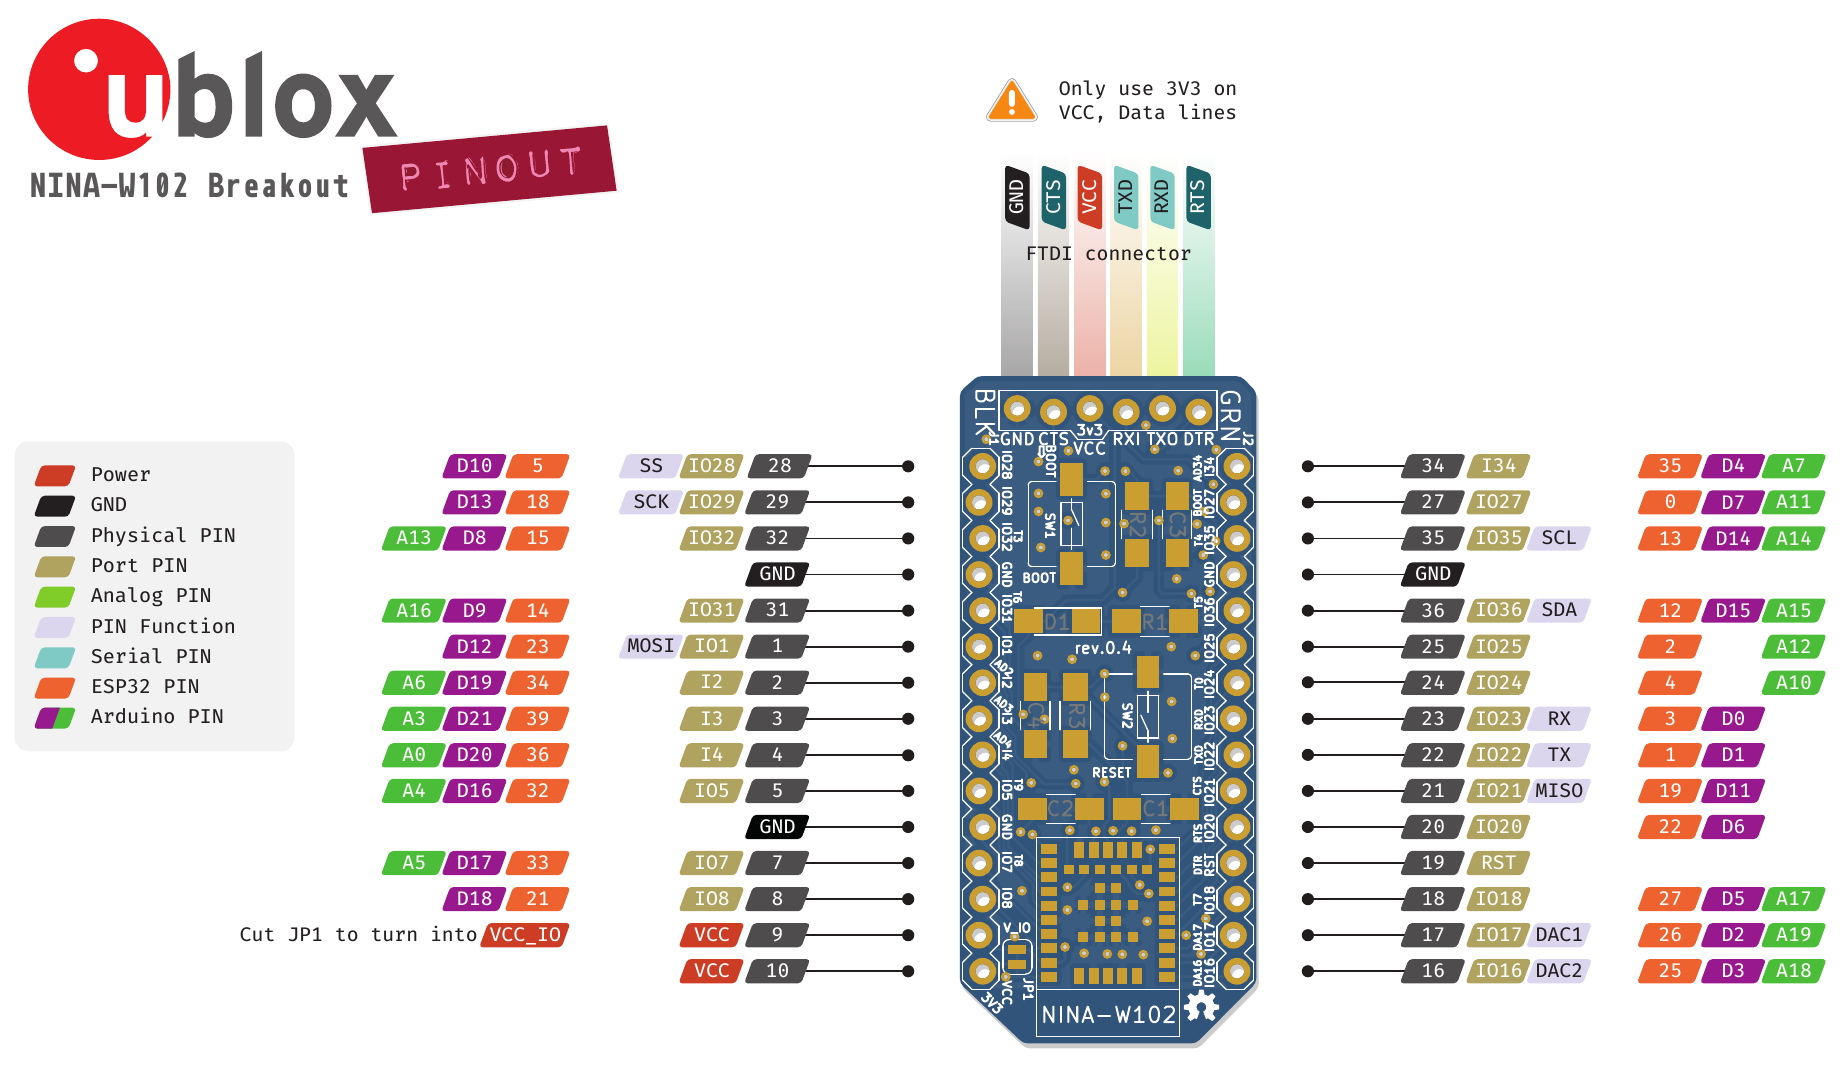
Pinout
Schematics
PCB Layout
BOM
| Ref | Qty | Value | Digikey | Price |
|---|---|---|---|---|
| C1, C2 | 2 | 100nF | 732-8086-1-ND | CHF 0.0871 |
| C3, C4 | 2 | 1uF | 732-7692-1-ND | CHF 0.1177 |
| D1 | 1 | GREEN LED | 732-5032-1-ND | CHF 0.1558 |
| J1, J2 | 2 | Conn_01x15 | WM50014-15-ND | CHF 0.34636 |
| R1 | 1 | 1kΩ | 541-1.0KECT-ND | CHF 0.0254 |
| R2, R3 | 2 | 10kΩ | 541-4201-1-ND | CHF 0.0147 |
| SW1, SW2 | 2 | Button | EG2663TR-ND | CHF 0.27930 |
| U1 | 1 | NINA-W102 | 672-1070-1-ND | CHF 8.- ~ CHF 20.- |
Note: The price for the NINA module is based on the ublox onlineshop and depends on how many units.
Making of
TBW. but was a fun journey with lots of last minute fixes and deliveries ;-)
Sources
KiCAD schematic and PCB design sources are available on my github at https://github.com/rac2030/breakout-boards/tree/master/ublox_NINA-W102
Team contributions
During the design phase, this board has been reviewed and challanged from various people that are not github commiters. Therefore here I would like to thank all the people who helped going into production:
- Benjamin Marty
- Dirk Zugenmaier
- Gonzalo Casas
- Matthias Schibli
- Michael Ammann
- Oliver Walkhoff
- Tillo Bosshart
- Urs Marti
Note: List is not in a specific order other than taken directly from TTN slack channel mz-badge and I may have forgotten to list someone here, ping me if it’s you.