MakeZurich - PakMan
Project entry for the MakeZurich 2018 Hackathon. A delivery box which monitors the environment of it’s content and send an alarm via LoRaWAN in case a threshold breach gets detected.
Challenge

Due to the fact that the challenge owner was absent all the time and there was not more information, we came up with our own usecase.
Idea
Challenge accepted… but on what should we focus?
Let’s take the use case of hospital transport. Let’s assume a medical transport has to be done between 2 Hospitals or just from a supplier to the receiver which needs it urgently. The content of the box which the courier needs to transport is sensitive to its environment, in our case we made it sensitive to temperature, humidity and VOCs (volatile organic compounds). As there is a time pressure, the courier needs to bring that packet as fast as possible from A to B. If B receives it and see’s that it is contaminated and needs to reorder another courier to bring a replacement, he will loose precious time which in case of a hospital could be live saving minutes. If we would have a box that has various sensors inside, control logic for realtime checking and an alerting function which lets the receiver know as soon as it is contaminated without waiting for the courier to arrive, it may be life saving for the receiver as he can go and order a replacement already.
To add some more fancyness to the thing, we wanted to create a little web application that uses bluetooth from the browser to connect to the teensy and configure it remotely. This would allow for setting the threshold for the 3 sensors (upper and lower) as well as seeing the statistics of the whole transport when it arrives.
Used Hardware
From the MakeZurich kit, we used:
- The Things Uno for some tryouts and as a plan B LoRaWAN interface
- The breadboard
- Unsoldered the Sensor module from the badge
- The Box itself as a container
Additionally, we used:
- Duck tape (*hint look at the backside of the NINA breakout module on the badge)
- 5V Emergency battery pack for cellphones
- Teensy 3.6
- HC-05 Bluetooth module
- Miromico SOS Button for hacking into it to trigger LoRaWAN messages
Team members
The team was formed ad-hoc on the MakeZurich event and consistet of Manuel Di Cerbo, Tony Kümin and me (Michel Racic).
What we hacked together
Given I had my personal hackathon the weeks before MakeZurich designing the badge and Tony (maker of the Treasure hunt) as well as Manuel had some other work to do, we only started late night on saturday and basically made the project in 2 - 3 hours on sunday.
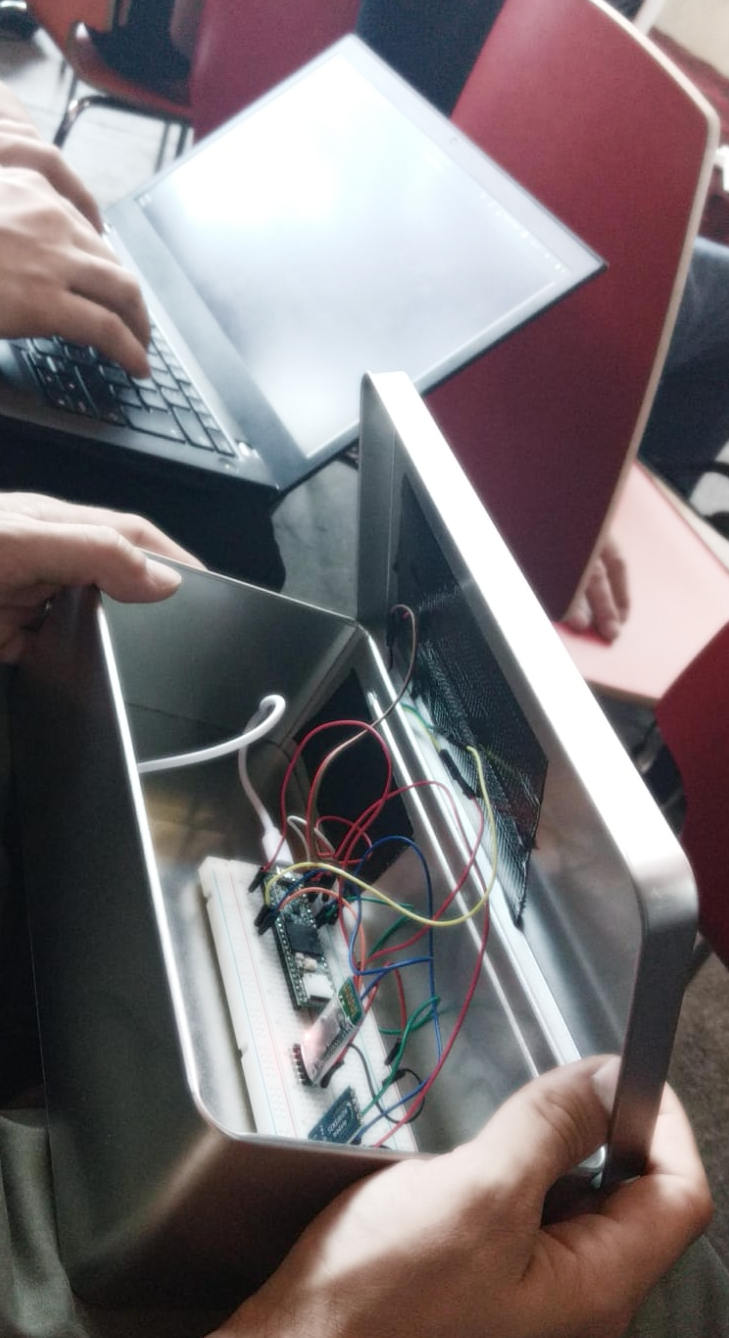
Final box
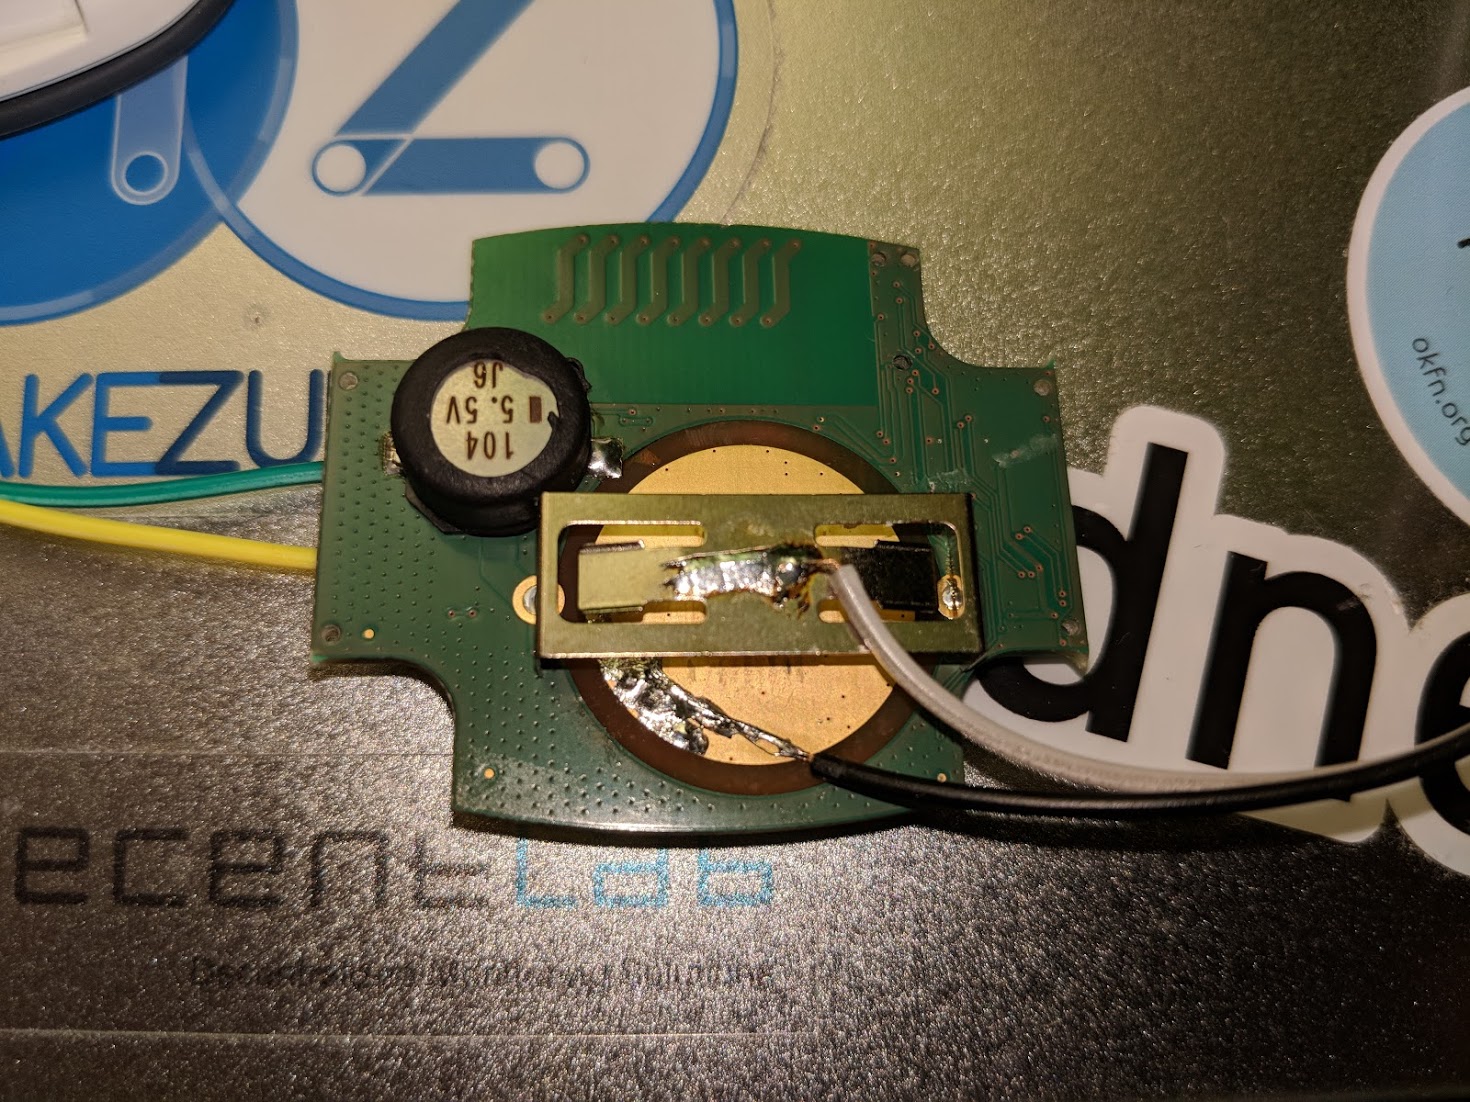
What you sadly don’t see in the picture is the hacked SOS button and I totally forgot to take some pictures on-site. Well I have a post mortem picture of the opened button and can tell a bit what I found out and how we used it. Sorry Miromico that we destroyed it in the process but fiddling with the timeline I broke the button cable so the only thing left is the actual board.
Hacking the Miromico SOS Button
This was my main goal and I had most fun fiddling around with it to see whats possible. Why? Just because… you know…. what could be more fun than hacking and repurposing something you find onsite at a hackathon to make something else with it.
Yes, next time it would be fun to directly use a FMLR module from Miromico, maybe they want to sponsor next years badge and we directly include it with some other basic stuff to make the badge the real base for all projects.
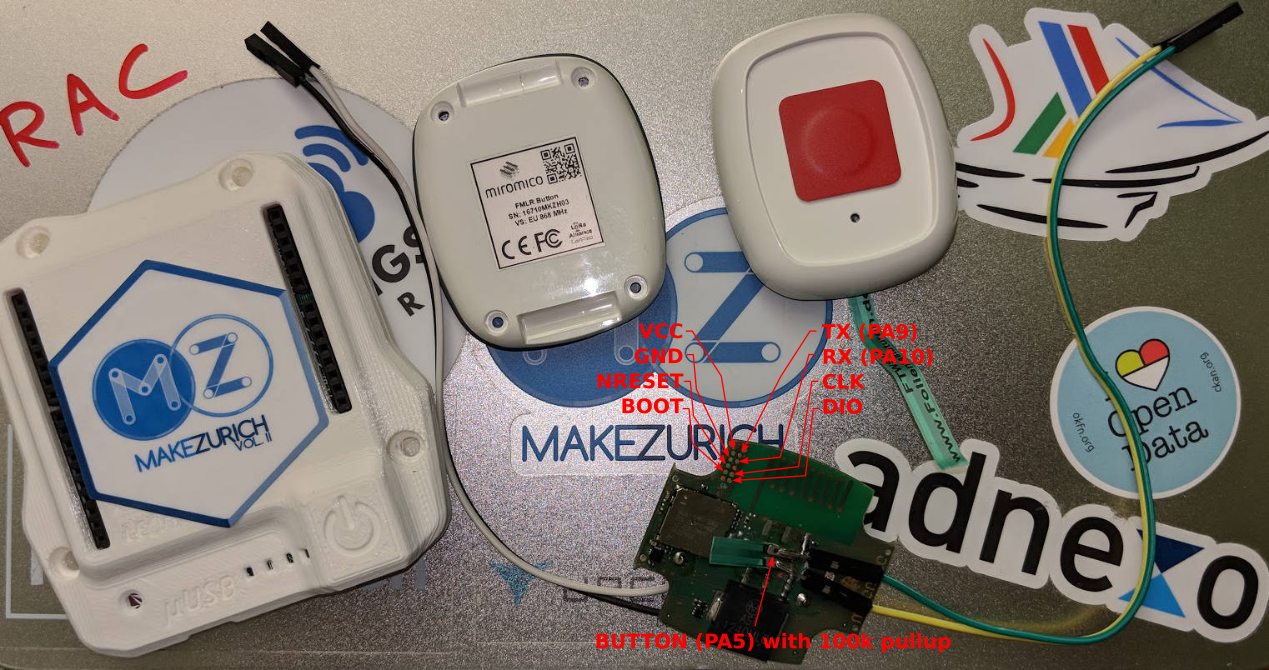
Interfacing the button PCB
Trough the programmer interface, I tried to exploit the AT commands to somehow inject a payload. The thing we found which looked promising was the set voltage command but after some tests, even it accepted the set command with OK, it did just report the actual battery voltage.
I did find some info in http://www.miromico.ch/tl_files/downloads/flyer/FMLR_AT_Protocol.pdf but what I did see was not the exact same commands implemented, so I guess this is for a newer or just different firmware for the STM32 that is inside.
We then decided to use just the button itself, pined one side to the ground and the other to a GPIO which we set to high.
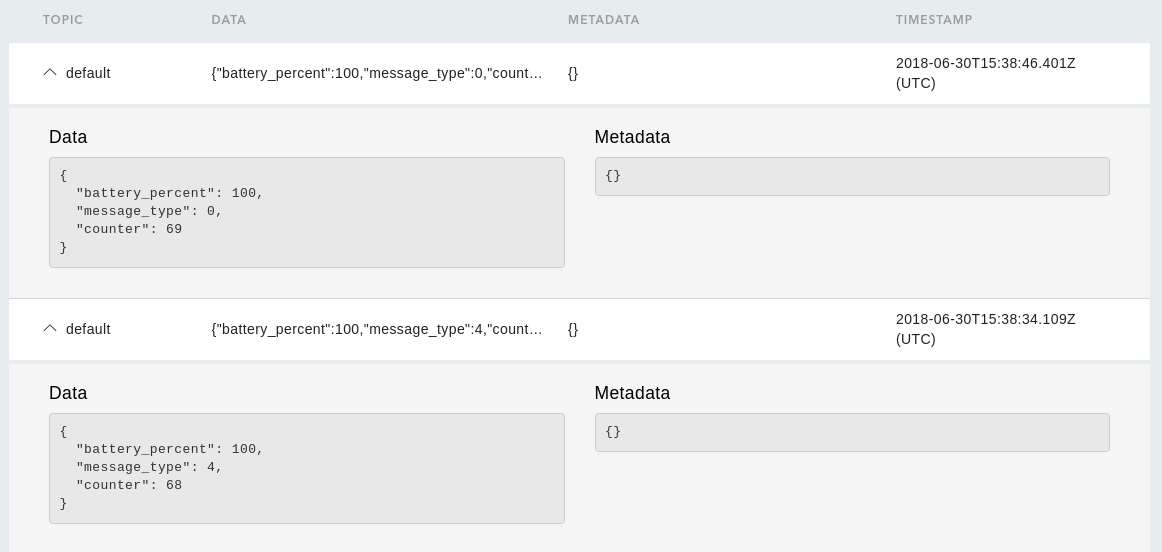
The rest of the code and how to interface the sensor module you can see in the source but to finish it off, a lora function that takes a custom delay as parameter is used to set the GPIO to low for a certain time. As we found out after our first test with having a 100ms delay was, that we can generate different payloads as event type using different delays. We have seen 3 different payloads (0, 2 and 4) but we haven’t drilled down more as there are probably more timings which means more different states we could send.
On the other side, we did setup Hivemind using the sponsored MakeZurich account which did receive those packets nearly in realtime.
Hivemind platform showing LoRa packets received
Source code
The Arduino source is available as gist on GitHub @ https://gist.github.com/rac2030/cad175b2b7370aac7197be80f413b6d1