MakeZurich - MoBiFloC
Project entry for the MakeZurich 2017 Hackathon.
A cheap and portable bike commuter flow counter node to enhance the existing sensor network. This will also be helpful to quickly bring up nodes at the right place to evaluate new routes and how they are used.
Challenge
- An existing loop counter (see existing sensors above) costs CHF 5000 (sensor + installation).
- Each loop counter actually consists of two loops in order to detect the direction of travel.
- Sensors use SIM cards and work reliably (traffic via France for some reason–maybe French SIM card or so).
- Robert Dorbritz, the responsible for slow traffic in Zürich, is mainly interested how bicycle usage develops over time. I.e. is it increasing? To what extent?
- Understanding the behavior of cyclists in different weather conditions is also an interesting aspect. E.g.: Is it worthwhile to plow the snow away from bike lanes in winter, given that the number of cyclist is very low?
- Where is the largest influx of cyclists entering the city?
Idea
Challenge accepted… but on what should we focus?
Create a measuring unit that is cheap (due to requiring numerous deployments, vandalism against the sensors) and can be deployed to where its needed without much efforts to enrich the existing data. As for the communication technology we wanted to use the existing LoRaWAN infrastructure from TTN Zürich because it was the main topic of this hackathon. After a week of research and tryouts in the MechArtLab I picked up on the idea of using a differential pressure sensor for this (idea source is TOMORROW LAB) and so the journey begins.
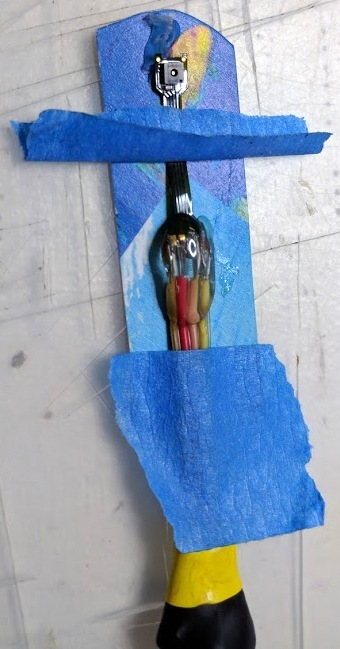
We wanted to use 2 differential pressure sensors with one tube each, which would allow us not only to count but also determine the direction of the bicycles passing over the sensor. We have no clue how exactly we want to distinguish pedestrians from bicycles but some ideas floating around was calculating the difference in speed between the two tubes being stepped on or the intensity of the pressure change. As we had a sonar sensor in the box, this could also have been used in some way and maybe combining the different sources we can find out the difference.
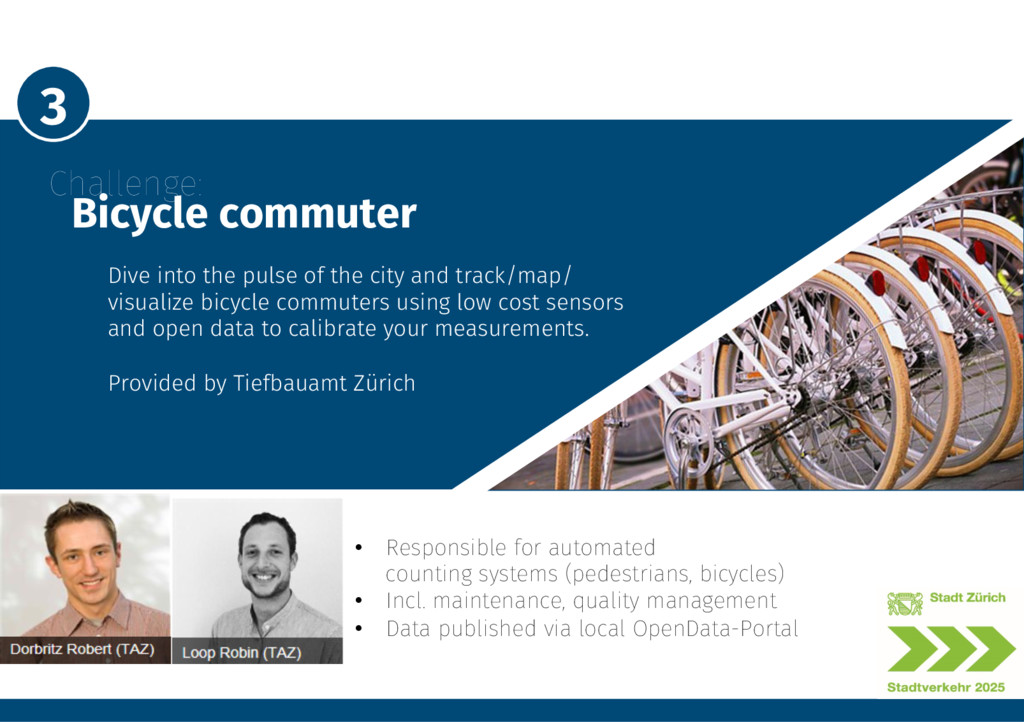
In order to enrich environmental data collection, we wanted to get current temperature and humidity from that place using the SHT31 we got as sample from Sensirion. Given that we did not had any 4-Pin flex PCB adapters on hand, some tinkering was involved - as you can see in the picture - having some fun with soldering tiny wires and fixing with hot glue such that it doesn’t break the PCB.
As a bonus and as we had the uBlox GPS on hand, we considered having a button on the measuring unit for initializing it after it has been placed. It would then transmit the current GPS position for the data that gets logged from this device. The benefit of an automated procedure for the operator is not to have to manually enter GPS data into some tool; also it prevents human error. To save the bandwidth the initialization procedure would only be required when the sensor gets relocated.
Used Hardware
From the MakeZurich kit (Box #3) , we used:
- Arduino Pro Mini 3.3V (8MHz)
- Microchip RN2483 LoRaWAN modem
- GPS uBlox PAM 7Q
Matthias Schibli from Sensirion was there and provided us samples of their sensors which we used:
- SHT31 - Temperature and humidity sensor
- SDP610 - Differential pressure sensor
- SDP3x - Differential pressure sensor
Team members
The team was formed on the MakeZurich slack channel and Tony Kümin joined me (Michel Racic) for implementing the idea of a simple and cheap prototype for enhancing the current sensor network for Zürich.
Day 1 - Friday, 3rd February
During the OpenLab week before, I already tested most of the sensors from the kit and got the LoRaWAN communication working. From Migros DoIt I organized a 5 Meter tube which did fit the spec of the SDP610 Sensor that it will nicely fit on the connector.
Fail #1 happened when we tested how well the SDP610 responds after mounting the first tube on a plate and connecting it… sadly the tube was not soft enough which meant that we need to get out and buy a new tube. Luckily a Jumbo was just around the corner and they had one with soft silicone, a bit bigger than the one we used and did fit on the sensor but we it did fit our old tube and we decided to cut a short piece from the old tube to make a connector between the sensor and the soft tube. We used 2 different sensors from Sensirion as we wanted to try out both and used them on the same I2C bus (together with the SHT31) and did not want to fix the address clash.
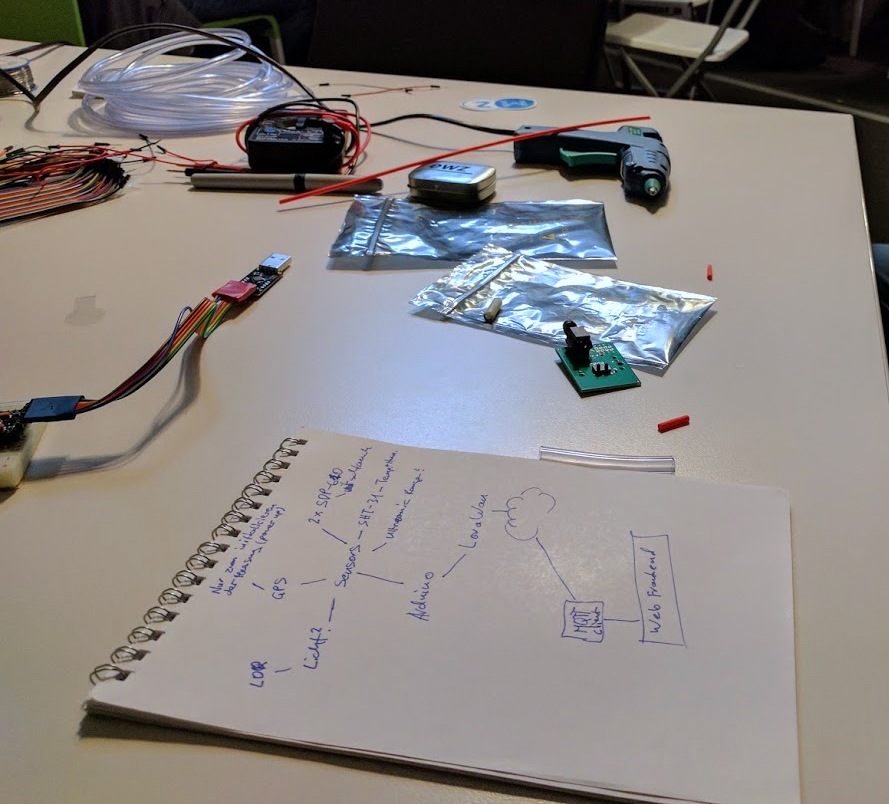
Prototype with only 1 tube
Short test outside the building looking at the sensor data
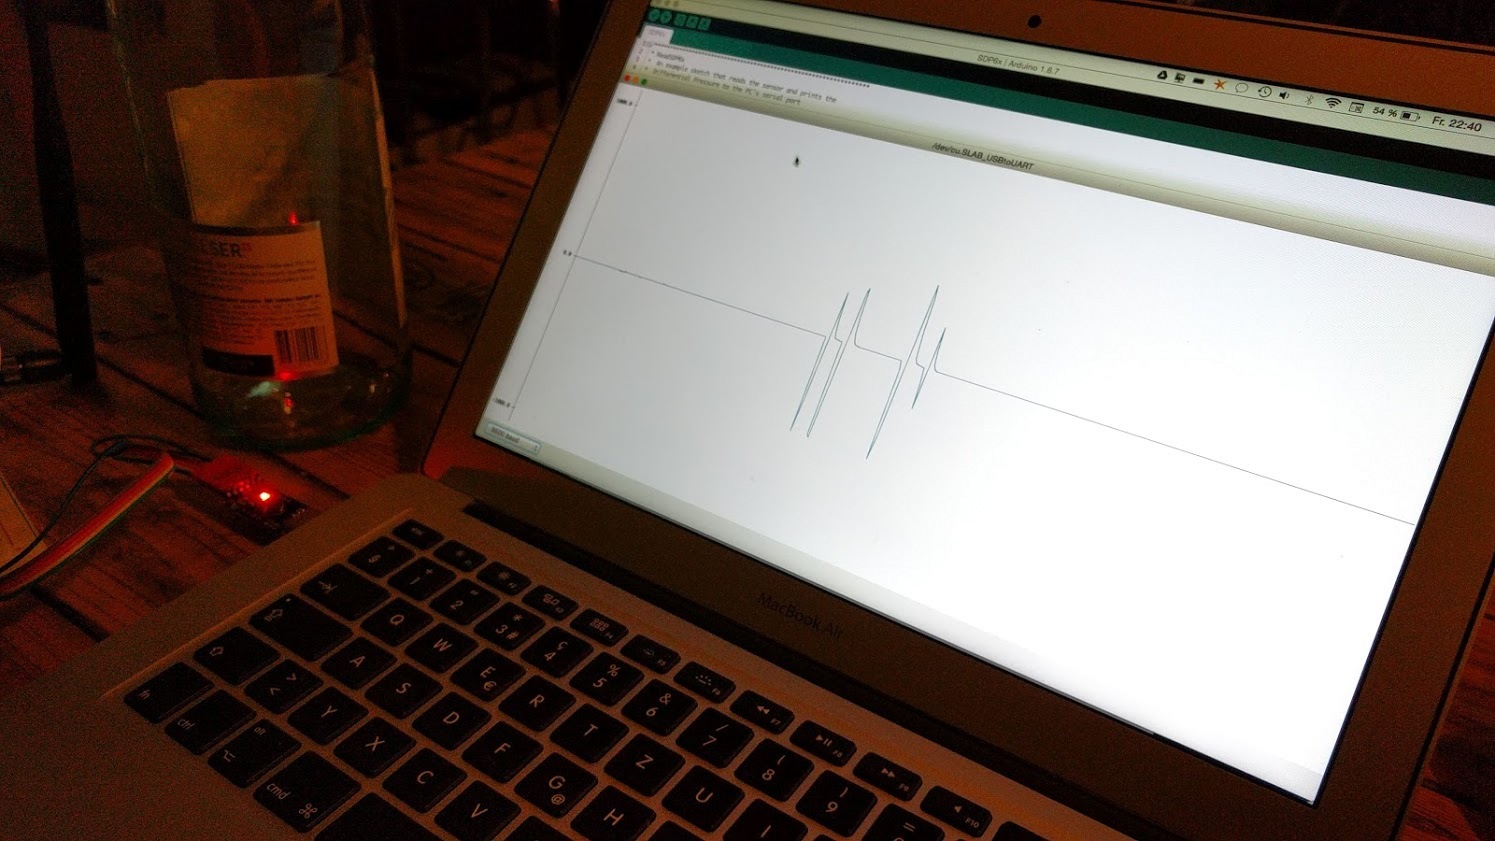
When the first tire compresses the tube, the air from inside will flow trough the sensor to the outside and when the wheel is gone the reverse will happen and the tube, which has one side closed and the other attached to the sensor, will suck in the air from outside. That explains why each wheel generates 2 spikes shortly after each other.
After a long working day, we need to fit the typical hackathon prototype and have some pizza for dinner.
Night from Friday to Saturday
Participants badge
![]()
Afterwards, all except Gonzalo Casas who slept on the couch did go home, I concentrated again on our project and hacked on the Arduino code getting all of the components working together in the same sketch and transmitting the data via LoRaWAN to a MQTT where the web application from Tony could receive and visualize it.
Day 2 - Saturday, 4th February
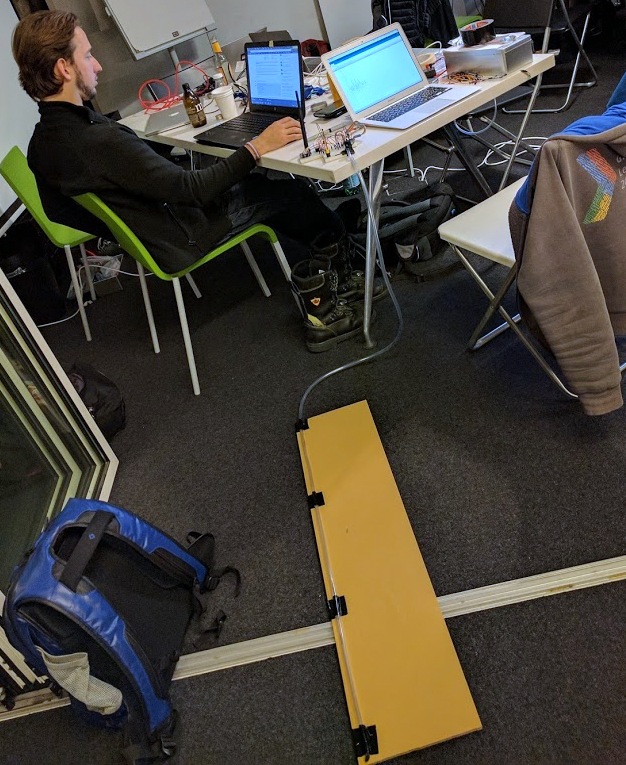
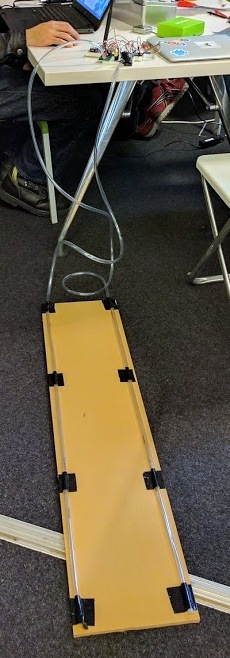
Prototype with 2 tubes for direction
On day 2 we mainly concentrated on getting the web GUI finished together with some monkeys (see GUI in action video) and combining the sensor readings. As always, time is running out so we haven’t combined all the sensors in the code but at least we have the individual pieces together and it detects when there is a bicycle rolling over (pattern). It will collect statistics data and send every 10 minutes a message over LoRaWAN with a timestamp and the count as well as data about the temperature.
The reason we only send data every 10 minutes (during demo every 1 minute) is the available LoRa bandwidth and the allowed air time per device of 15 seconds per day. We minimized the payload as much as possible but still the air time used will also be affected by the distance to the next hub which will pickup our signal and send the data to the MQTT of the TTN network.
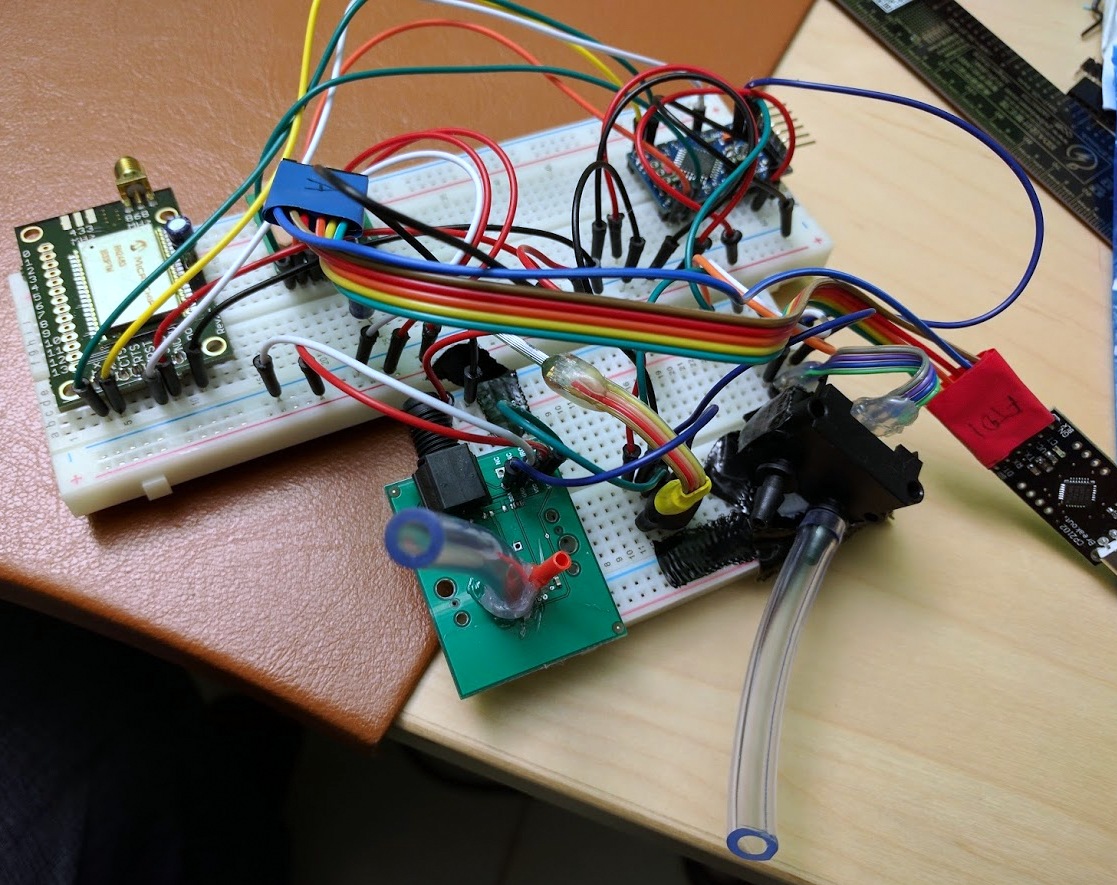
Final breadboard after getting home again and a goooooooooooooooood night (sunday) of sleep
Source code
The Arduino and the NodeJS WebApplication is available on GitHub @ https://github.com/rac2030/MakeZurich/tree/master/MoBiFloC
Videos
First outdoor trials with the prototype
LoraWAN data receiver web GUI in action
Presentation on the end of the hackathon
Speaker deck of all challenges
Our challenge is on Slide 19 to 22 speakerdeck d1a88578acb34ebdbd62c8e5c36c96f0